The Soap
Room
A month in the
Soap Room


Mixing, Scenting,
PuringThe first day of a new soap's life consists of blending oils and lye to make cold-process soap, which we then scent with essential oils while it is still liquid, before pouring it into moulds to cure and set.
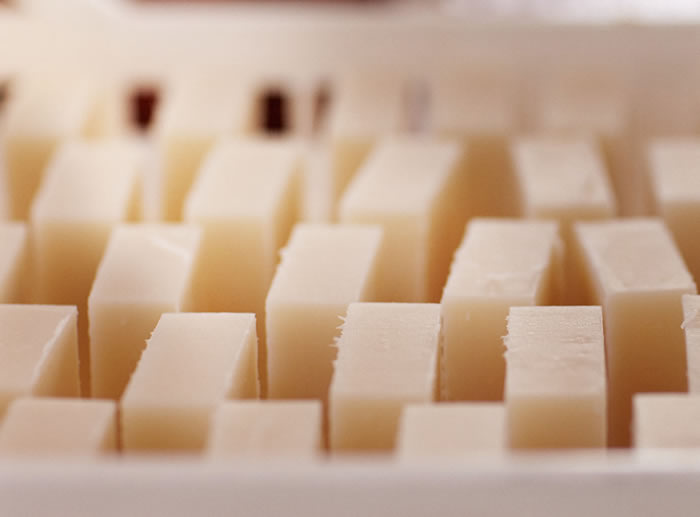
Cutting
and DryingAfter the soap has cured for between one and two weeks, we remove it from the moulds and cut it into long loaves, similar to loaves of bread. A week later the loaves are sliced into what will become the final soap bars.
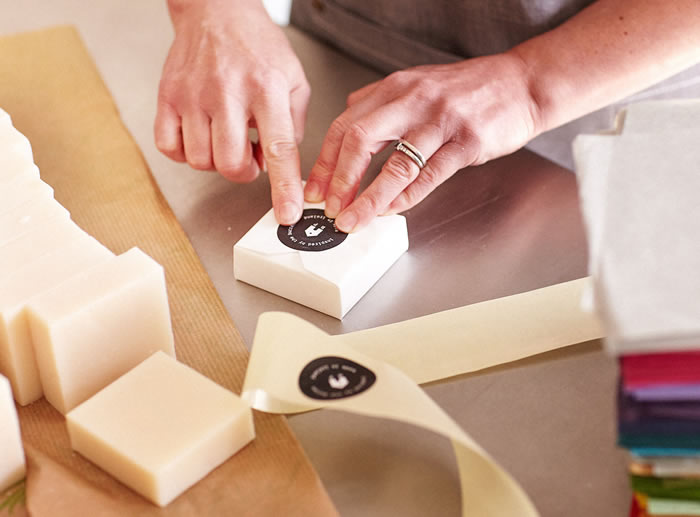
Wrapping
When the individual bars are fully dried, they are hand wrapped. First in parchment paper to preserve their scent and stop them drying out, then in their outer wrapping. We use a Japanese wrapping technique to achieve a pretty wrap with no awkward corners.
Cold Soap Making
The soaps we make at the Burren Perfumery are mainly made using what is known as the cold process.
Cold process soap is made by mixing oils and lye (sodium hydroxide) at a certain temperature such that the (acid) fats chemically combine with the (base) lye and saponify into soap (a salt).
Get Started
More ❯Soap making begins with filling a large, stainless steel double-boiler with the oils we use: coconut and palm oils in solid form and liquid olive oil. Coconut oil has excellent lathering and moisturising properties but creates a brittle soap that is consumed quickly. Olive oil is an especially good moisturiser as it attracts external moisture and holds it to the skin. It produces a much softer soap that is slow to lather, cleans well and is good for sensitive skin. Palm oil adds to the firmness of the bar and produces a lather that cleanses well.
Blending soap oils
More ❯By combining these oils we can create a soap that cleans well, lathers easily, moisturises the skin and remains firm to handle. By varying the proportions of these oils we can change the properties of the soaps if we wish to produce, for example, a foamy shaving soap, or a richer, softer moisturising soap. Our double-boiler holds about 120 kg of oils, and it therefore takes a while for the hard oils to melt and then for the whole mixture to come up to temperature. So we often load the boiler the previous evening and set the heater to come on by timer a few hours before we intend to mix.
Adding lye
More ❯The other half of the equation is sodium hydroxide, also known as lye, which we buy in granular form and dissolve in water. Caustic soda, as it's also known, is extremely, well, caustic. Dissolving it is a slow process and one has to wear protective gloves, visor and protective filters for breathing. If you inadvertently get some on your skin (and I nearly always do) it hurts. A lot. As it dissolves the lye gives off heat and the solution eventually heats up to 60 or 65 C, too hot for soap making, so again, we mix the night before and then usually by morning the solution has cooled to near the working temperature required.
When you mix the liquid oils and lye solution, both components need to be at the same temperature and it needs to be in the range of 37 to 45 C. We use a laser thermometer to check the temperature in each heater as we get ready to mix, and stir each with stainless steel paddles to evenly distribute the heat, as, particularly in the case of the oil mixture, the temperature at the surface is usually several degrees above the temperature at the base, where the tap is.
Mixing
More ❯All measurement and mixing is done by weight. Between our two boilers we have a high precision weighing platform that can weigh up to 500 kgs. This makes mixing super-easy. The mixing pot is put in place and the weighing scales is zeroed. We tap the oil mixture into jugs and fill the pot until it reaches the required weight for the batch size we are making. Then we add the lye solution in the same way until the total weight of the batch is reached.
Now that our batches are up to 40 kg, we use an industrial power drill. One has to work relatively quickly through this stage to ensure that the two components remain close in temperature while they are mixed. At the same time you have to be careful to get the weights right, otherwise the soap may be too hard, too soft or not saponify at all. Once the ingredients are together they are stirred initially with a paddle to blend them, then they need to be rapidly mixed until the saponification process begins. When we used to make soap in 4 kg batches, we mixed the oils using a hand blender, such as you would use for soup or cream. Now that our batches are up to 40 kg, we use an industrial power drill. The mixture must be stirred consistently and continuously, not too fast, nor too slow, until it reaches "trace".
This is a fairly critical stage. If the soap mixture isn't properly mixed, it may not saponify evenly, leading to pockets of unsaponified lye and unusable soap. Too little stirring and it may not saponify at all. Too much and it can start to set before it is poured. Too fast and air is sucked into the mix, leading to bubbles in the soap and uneven saponification. And if you get distracted and bring the whisk to the surface while it's running, you and everything around you gets spattered with hot, liquid, unsaponified soap (which is still caustic!).
While the soap is being mixed (or sometimes the previous day), a soap mould is prepared. We use custom-made moulds that are assembled from five heavy plates of plastic. The plates are grooved so that they fit together with a tight seal and the base of the mould is incised with a pattern that matches the shape of our square bars. The moulds are seven bars wide and five deep. A mould weighs close to 50 kgs when filled, and will yield between 300 and 350 bars of finished soap. The moulds are lined with greaseproof paper to make it easier to remove the sides when the block is ready to be cut.
Saponification
More ❯Meanwhile, the soapmaker continues mixing until the soap starts to trace. This is something like when meringue starts to stiffen or cream to clot. When the soap mix starts to hold the trace of a paddle or spatula drawn through it, saponification has started and it is ready to be poured. At this stage we add the essential oils. This preserves the scent and other properties of the oils, which would otherwise be overwhelmed by the saponification process. The oils are stirred in gently and then the mould is positioned beside the mixing point and the mixture decanted into it in one smooth pour to minimise the amount of bubbles formed.
Once the process of saponification has started, it continues of its own accord, generating heat as the soap cures. The mixture which started at 42 C may reach 53 or 55 C within a few hours as the process peaks before the soap cools and sets. During this time the soap, initially opaque when poured, becomes translucent for a while, before reverting to a creamy white colour, and any unsaponified lye comes to the surface of the mould, where it is scrapped off when the block is prepared for cutting.
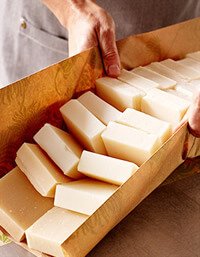
The soap may be ready to cut within as little as 48 hours, but we usually leave it for about a week. After this we winch the entire mould onto our cutting table, unbolt it, remove the four sides and peel away the greaseproof paper. We used a grid of fine wire driven by compressed air to cut the block into 35 loaves of soap. Then a finer grid is used to cut the loaves into bars, like sliced bread. The bars are stacked in open plastic trays and left to dry for a further 4 to 5 weeks, before they are wrapped.
Cold process soap making is like baking a cake: pretty easy if you follow a good recipe and pay attention to what you are doing. It is certainly something you can do at home, as long as you take proper precautions when handling the lye. There are many sites on the web which will give detailed recipes and instructions, and many books also. Once you have the basic process mastered, you can begin to play with different ingredients, different proportions, adding oils, clays, flowers, whatever.